Contact Us
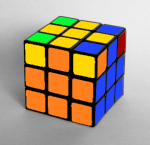
How to solve the Rubik’s Cube
For the Advanced method click here.There are many approaches on how to solve the Rubik’s Cube. All these methods have different levels of difficulties, for speedcubers or beginners, even for solving the cube blindfolded. Usually people can solve one face of the cube intuitively, after that they need some help. In the following article I’m going to show you the easiest way to solve the cube using the beginner’s method.
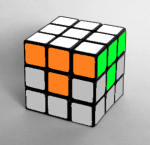
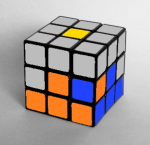
Demonstrating the layer-by-layer method
The method presented here divides the cube in layers and you can solve every layer one by one applying the given algorithm not messing up the pieces already in place. You can find a separate page for each one of the seven stages if the description on this page is not enough.
To get started we recommend you to read the basic cubing terminology and you will need to know the Rubik’s Cube notation ie what the letters mean in the algorithms:
F: front, R: right, U: up, B: back, L: left, D: down.
(Counterclockwise rotations are marked with an apostrophe: F’)
If you want to see how this cube solving method works or want to get further help then you might find the online Rubik’s Cube solver program interesting which uses similar steps. If you get stuck or you don’t understand something, the software will help you. Just input the scramble of your puzzle and the program will show you the steps leading to the solution.
To keep a record of your solution times try the online Rubik’s Cube Stopwatch with graphical interface and generate random shuffles with the online puzzle scramble generator. The timer calculates your statistics and it is a useful tool for beginners and professionals too.
The Solution step by step
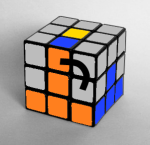
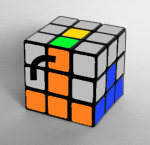
1. White cross
Bad white cross
Good white cross
Let’s begin with the white face. First we have to make a white cross paying attention to the colour of the center pieces. This step is quite intuitive, you can do it for sure with a little practice. Just move the white edges to their places not messing up the ones already fixed.
If you have difficulties, you can get a little more help with animated algorithms about solving the white cross on the Rubik’s Cube clicking here.
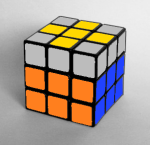
2. White corners
In this step we have to arrange all the white corner pieces, so we finish the first face. This step is still intuitive, you can do it without learning a single algorithm. If you don’t have patience I’ll give you some clues. Move the white corner under the spot where it’s supposed to be, then do one of the three algorithms according to the orientation of the piece, aka. in which direction the white sticker is facing. If the white corner piece is where it belongs but turned wrong then first you have to pop it out.
For more details about the solution of the white corners here.
White face solved
R’ D D R D R’ D’ R

F D F’
R’ D’ R
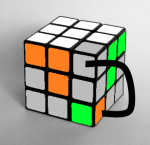
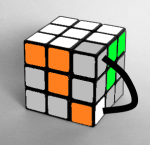
3. Second layer
Until this point the procedure was intuitive, from now on we have to use algorithms. We can turn the white face to the bottom and in this step we will complete the first two layers (F2L). There are two algorithms we use and they are symmetric. They’re called the F2L Right and F2L Leftalgorithms. These algorithms insert the Up-Front edge piece from the top layer in the middle layer not messing up the already solved white face.
If an edge piece is on its place in the second layer orienting wrong then we have to apply the algorithm twice. First we must pop it out inserting another one in its place.
F2L solved
Wrong orientation
Right: U R U’ R’ U’ F’ U F
Left: U’ L’ U L U F U’ F’
See these F2L algorithms in action following this link.
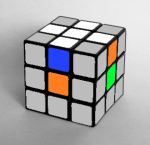
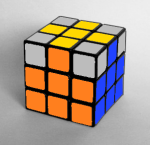
4. Yellow cross
Yellow cross on the top
Now make a yellow cross on the top of the cube. It doesn’t matter if the pieces are not on their final places so we don’t have to pay attention to the colours of the sides now. Just make a yellow cross on the top, we will swap them in the next step.
We can get three possible patterns on the top. We can get from one to the other pattern with a single algorithm as seen on the image: F R U R’ U’ F’
- If you have a yellow “L” shape you’ll have to apply the algorithm twice, holding the cube in your hands as seen on the first image below.
- In case of a horizontal line you just have to make the permutation once.

For further explication about forming a yellow cross on the Rubik’s Cube click here.
5. Yellow edges
Yellow edges done
Switch the edges
After making the yellow cross on the top of the cube you have to put the yellow edge pieces on their right places where they belong. Switch the front and left yellow edges with the following algorithm:
R U R’ U R U U R’ U
There are situations when you have to apply this algorithm more than once.
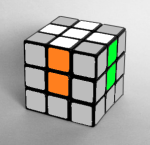
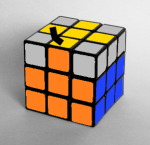
6. Yellow corners on their places
Switch three corner pieces
Only the last layer corner pieces are left. First we have to get them to the right spot, so don’t worry about the orientation in this step.
Find a piece which is already on the right place, move it to the right-front-top corner then apply the following algorithm to switch (rotate) the three wrong pieces:
U R U’ L’ U R’ U’ L
Do this twice to do an inverse rotation of the pieces. If none of the yellow corners is on the right place then do the algorithm once so one of them will go to the right spot.
Read more about the permutation of last layer yellow corners here.
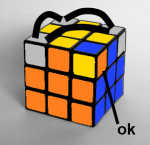
7. Orient Yellow corners
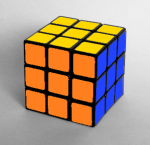
The cube is solved
Orient the corner pieces
Now all the pieces are on their right places you just have to orient the yellow corner pieces.
Hold the cube in your hand so the piece you want to orient is on the front-right-top corner, then do the R’ D’ R D algorithm twice or four times until that specific piece is oriented well. It seems like you messed up the whole cube but don’t worry, it will be all right when all the corner pieces are oriented.
After that with a U’ turn move another yellow piece you want to orient to the front-right-top corner of the cube and do R’ D’ R D again while this specific piece is ok. Be careful not to move the two bottom layers between the algorithms and never rotate the whole cube!
You are so close to the end so be careful because this is the step in this tutorial where most people get lost. If this description doesn’t make sense, check out a few examples clicking here.
Repeat this until your Cube is solved
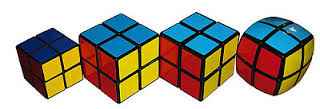
2*2 soluton
The 2x2 Rubik's Cube solution
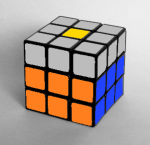
Step 1: Solving the first layer
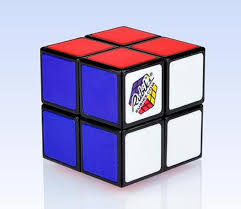
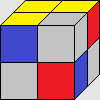
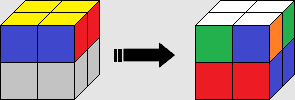
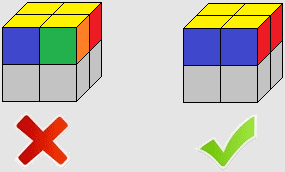 This step is identical to step 2 of the 3x3 cube solution. Choose a color to start with (Most popular color to start with is white or yellow – In this guide I chose yellow). Choose a corner that has this color (yellow in our case), and bring the other 3 corner pieces to it. Make sure that you solve the corner pieces correctly in relation to each other (also the side colors of the corner pieces should fit each other, not only the yellow. See image- right/wrong).
There are 3 different cases to solve a corner piece to its correct position without harming the other corners:
F D F'
R' D' R
R' D2 R D R' D' R
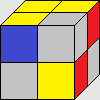
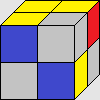
Step 2: Orienting the last layer pieces
 Flip the cube upside down (the solved layer should be on the bottom now). In this step the goal is to orient the last layer pieces. The result should be that the opposite color to the color we started with will be completed (In our case: the opposite color to yellow is white). Note that unlike the first step, here the permutation of the corners does not matter, meaning that they don't have to be correctly solved in relation to each other (side stickers don't have to fit).
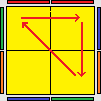
There are 7 possible cases of last layer orientations (not including the already oriented case):
(The gray color means the sticker is not the upper face color. The bars to the sides show where the upper face color is. In our case it's white, not yellow. It doesn't matter of course.)
Case #1
R' U' R U' R' U2 R
Case #2
L U L' U L U2 L'
Case #3
R2 U2 R U2 R2
Case #4
F [R U R' U'] [R U R' U'] F'
Case #5
F [R U R' U'] F'
Case #6
[R U R' U'] [R' F R F']
Case #7
[F R U' R' U' R U R' F']
It is best to learn all the 7 algorithms. However, it is possible to completely solve this step using only 1 algorithm – the first algorithm. The idea is to execute this algorithm from different angles until its suitable case shows up, then execute it one more time and solve the step. It is possible to solve all possible cases within 3 executions, or 2 if you use also its mirror algorithm (case #2).
The first algorithm orients 3 corners counter-clockwise and leaves the 4th corner intact (its mirror algorithm, case #2, does the same, but clockwise). Before executing, try to think from which angle executing this algorithm will leave only 1 oriented corner (can be done within 1 execution from all cases), than just apply the suitable algorithm (case #1 or #2). You can execute algorithm #1 twice instead of the using #2 algorithm when it's needed (in a case a clockwise rotation needed (case#2). Doing counter-clockwise twice for the corners will be just like doing a clockwise orientation, which will solve them.)
Note that 6 of these 7 algorithms are exactly the same algorithms being used in the speedsolving method of the Rubik's cube. You can see it is the same 7 possible cases when all the edges of the 3x3 are oriented: OLL algorithms page. However, since there are no edges to preserve, we can use shorter algorithms from other cases of the traditional OLL of the 3x3 Rubik's cube, as long as they rotate the corners as we need:
- For the first case best algorithm is the anti-Sune (OLL algorithm #26)
- For the second case best algorithm is the Sune (OLL algorithm #27)
- The third case is special: a shorter algorithm can be applied, which does exist in the 3x3 OLL, however OLL algorithm #21 is very nice)
- For the fourth case best algorithm is the easiest L (OLL algorithm #48)
- For the fifth case best algorithm is the first T (OLL algorithm #45)
- For the sixth case best algorithm is the second T (OLL algorithm #33)
- For the seventh case best algorithm is the first Fish (OLL algorithm #37)
Step 3 (and last): Permuting the last layer pieces
 In this step the goal is to permute the last layer pieces so they will be also correctly solved in relation to each other, and not only correctly oriented. This step is very similar to step 5 of the 3x3 solution (beginner's method) (-also the same algorithm can be applied, it is just that the one I show here permutes the corners clockwise and not counter-clockwise).
 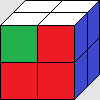 The way to solve this method is by looking for 2 corners that are correctly permuted in relation to each other (can be easily recognized by the fact that 2 correctly solved corners in relation to each other has the same color on their mutual face. Look for the same color in 2 adjacent corners). If you don't have 2 corners that are correctly permuted, just execute the following algorithm below from any angle that you want. After that execution, 2 correctly permuted corners will show up.
Then:
- Do some U turns so the 2 adjacent same colors will line up with their color on the bottom layer. Rotate the cube so that this solved color will be on the right face- see image above.
- Do U' once.
The effect of this move is that the front-left corner will become "solved" now, and the 3 other corners will require a clockwise rotation between them. This is exactly what the next algorithm does. - Execute the following algorithm: (This is the Aa-perm algorithm. l' replaced for L' because no middle layer)
L' U R' D2 R U' R' D2 R2
That’s it! You have just solved the 2 by 2 Rubik's cube! Congratulations! Keep practicing on solving the first layer and learn the algorithms by heart, so you could solve the 2x2 cube without needing them written around you (They are also useful for 3x3 speedcubing!). If you didn't solve the 3x3 Rubik's cube yet, it's just about the time to start, you already have much of the basics! Congratulations!